Dear all, welcome to my nativity for 2025.
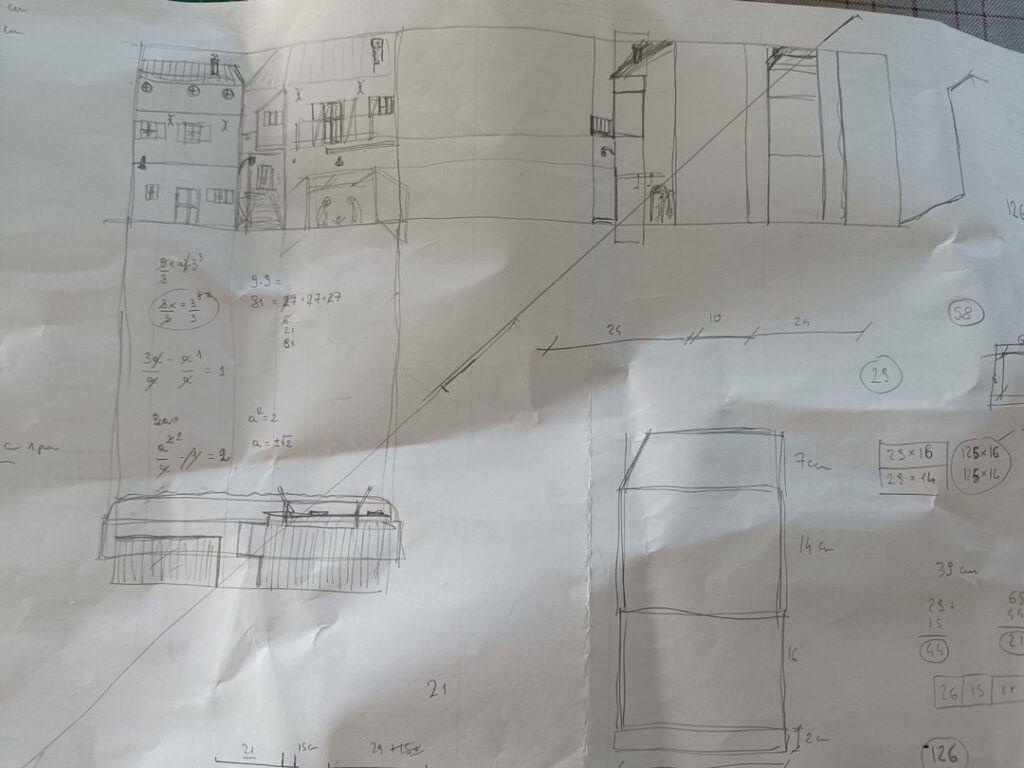
First of all I usually start with a simple plan on paper (that clearly changes over the time but not so much).
I have to admit that this year I did not take so many pictures of the work ongoing but I will try to explain every step as much ad I can do.
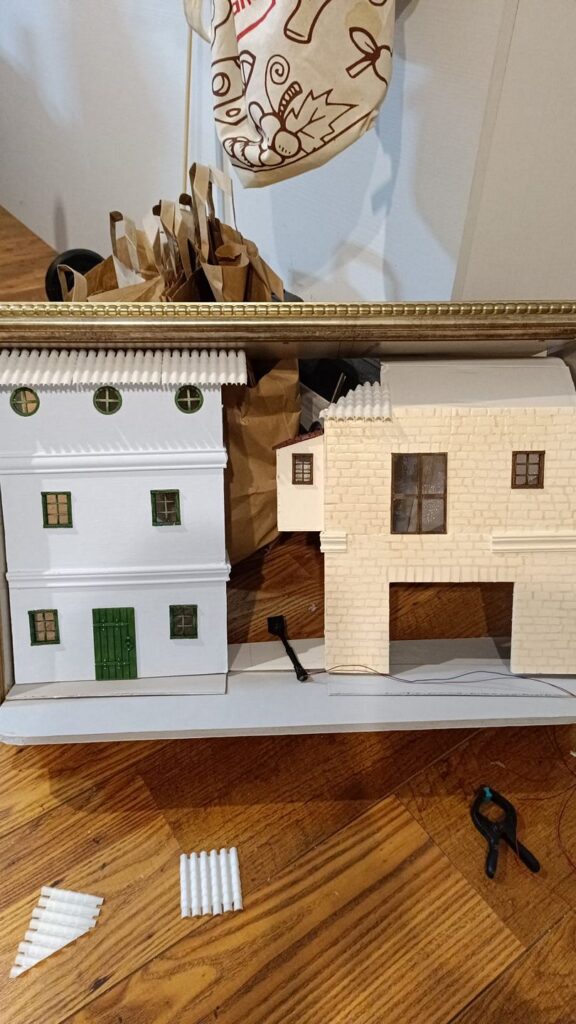
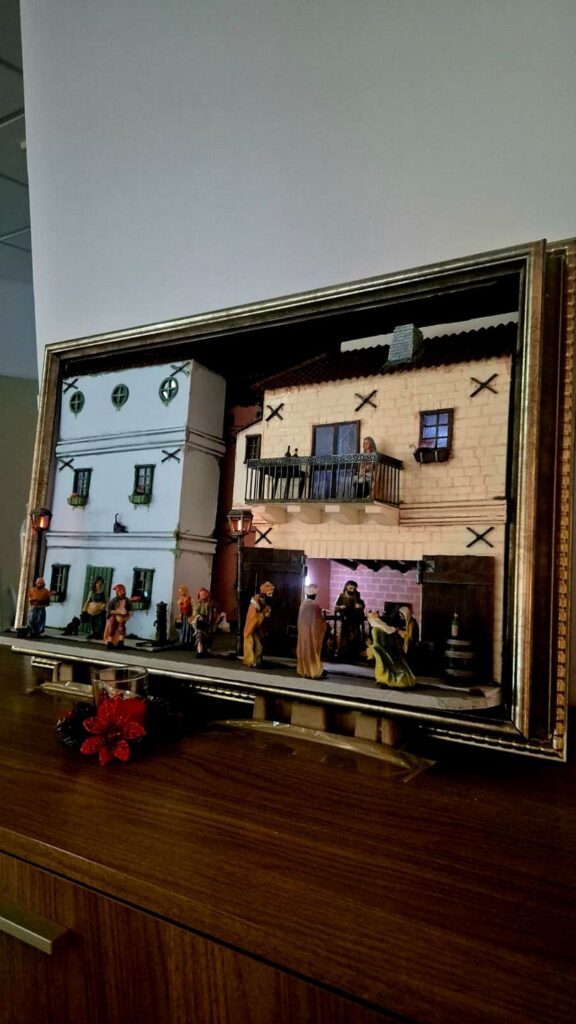
So the idea is to recreate an italian city ambient but this time included in a frame. I enlarged the frame with wooden planks (taken from a parquet set) in order to have more deepness. The frame was bought and then glued todether.
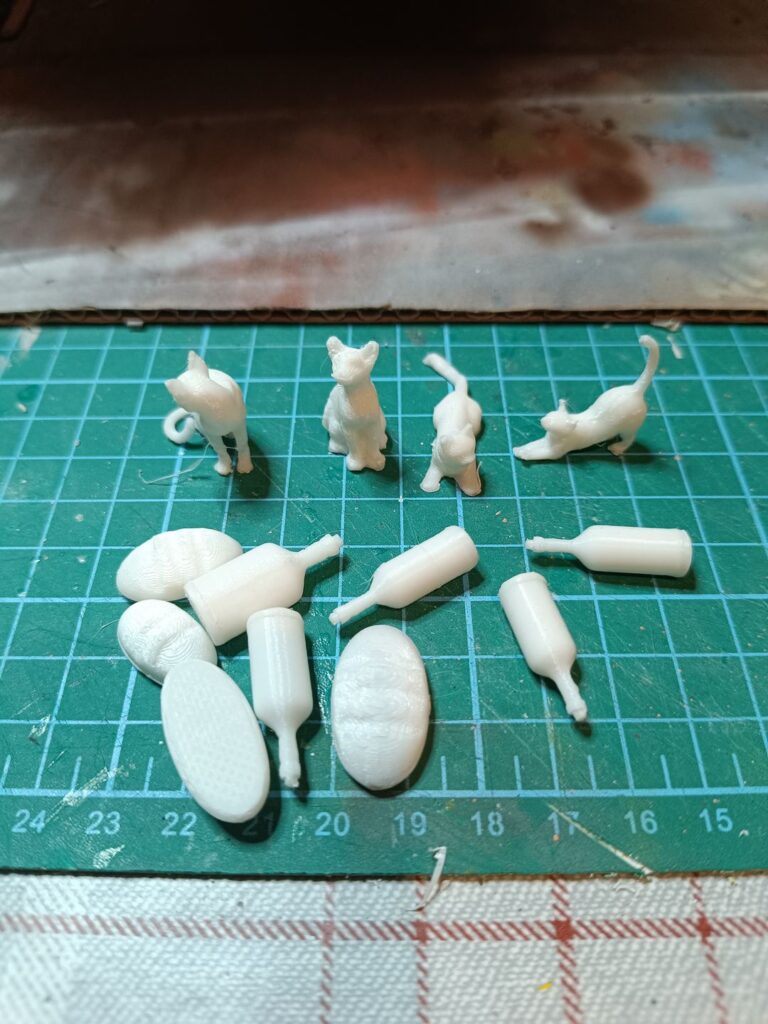
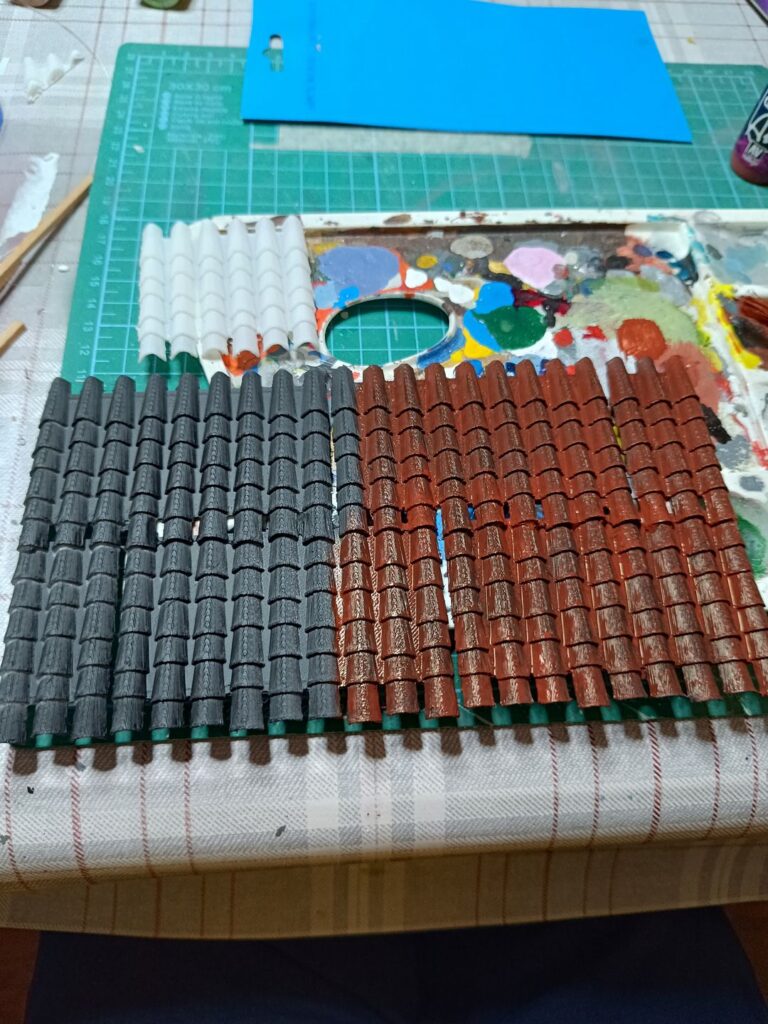
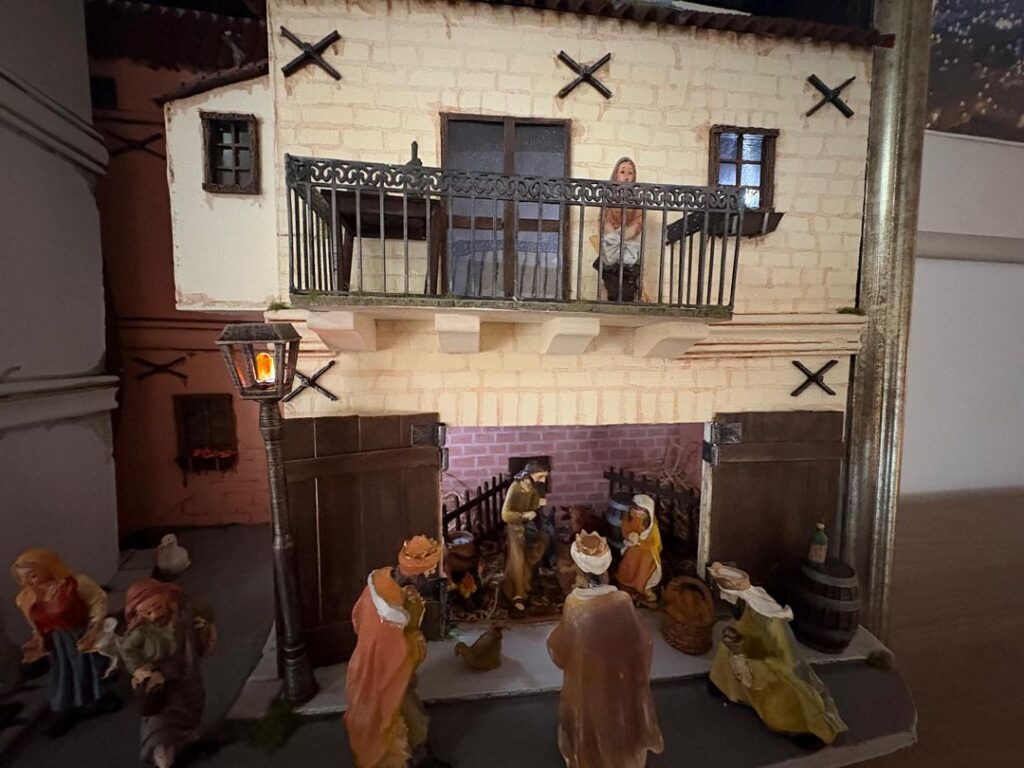
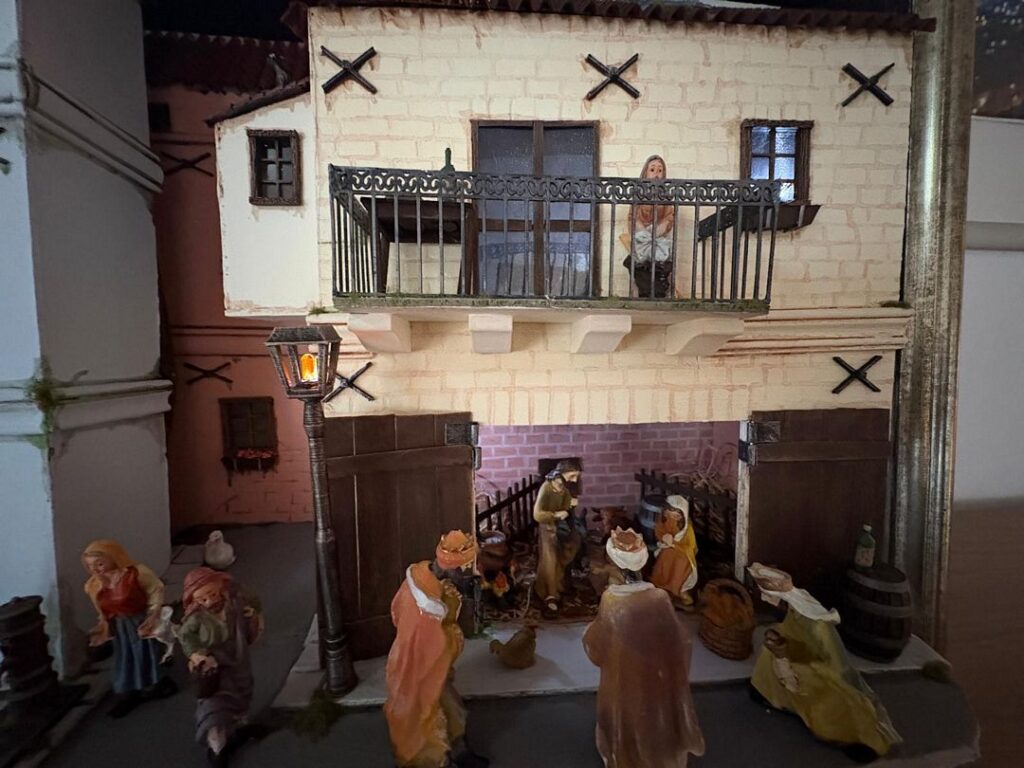
After that I started printing with my Crealty Neo Ender the little parts that I needed, the lights for the street, the windows, part of the doors and something else like the roofs, a fountain, some flowers hangings for the windows and few cats that I wanted to include in the nativity.
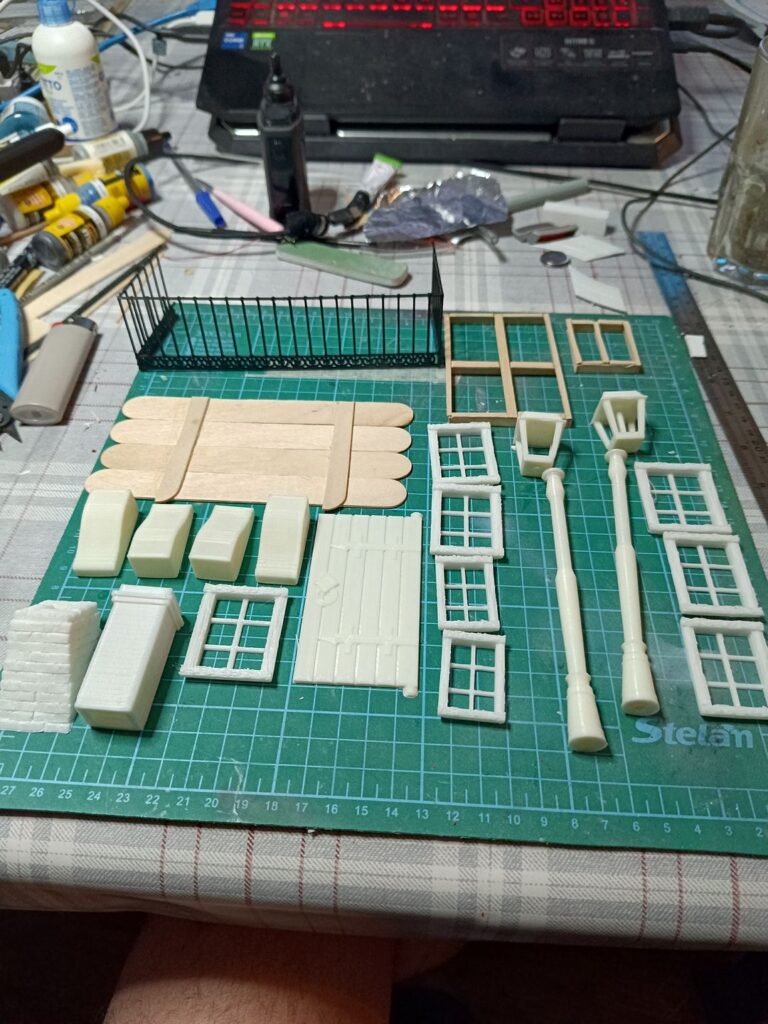
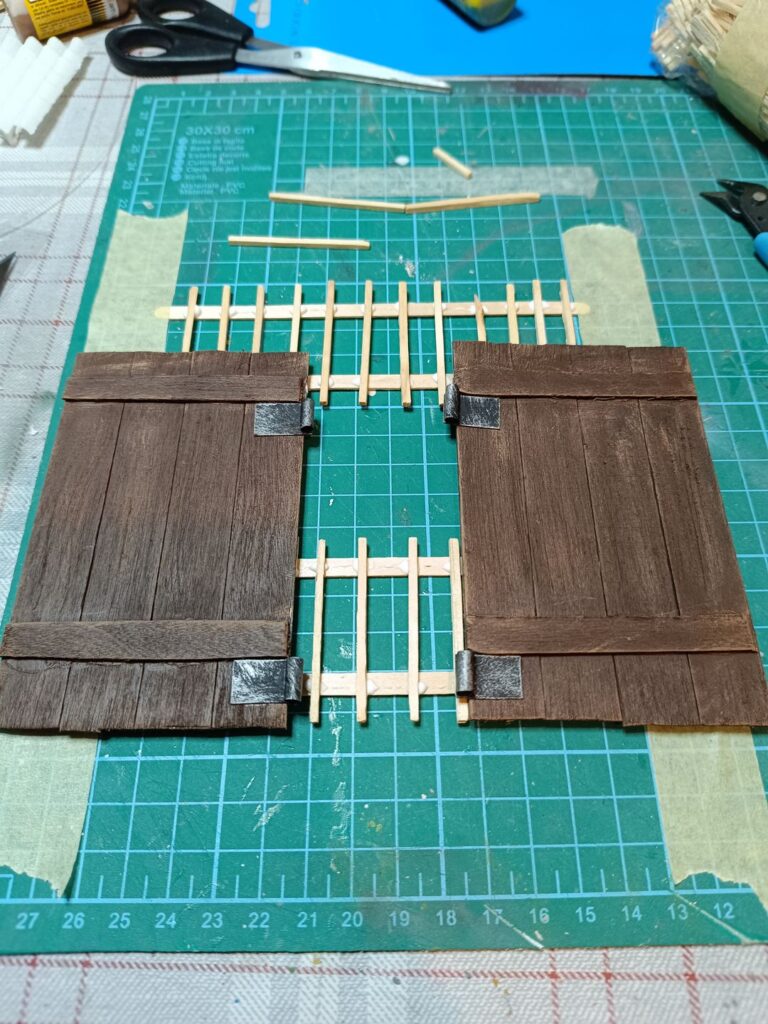
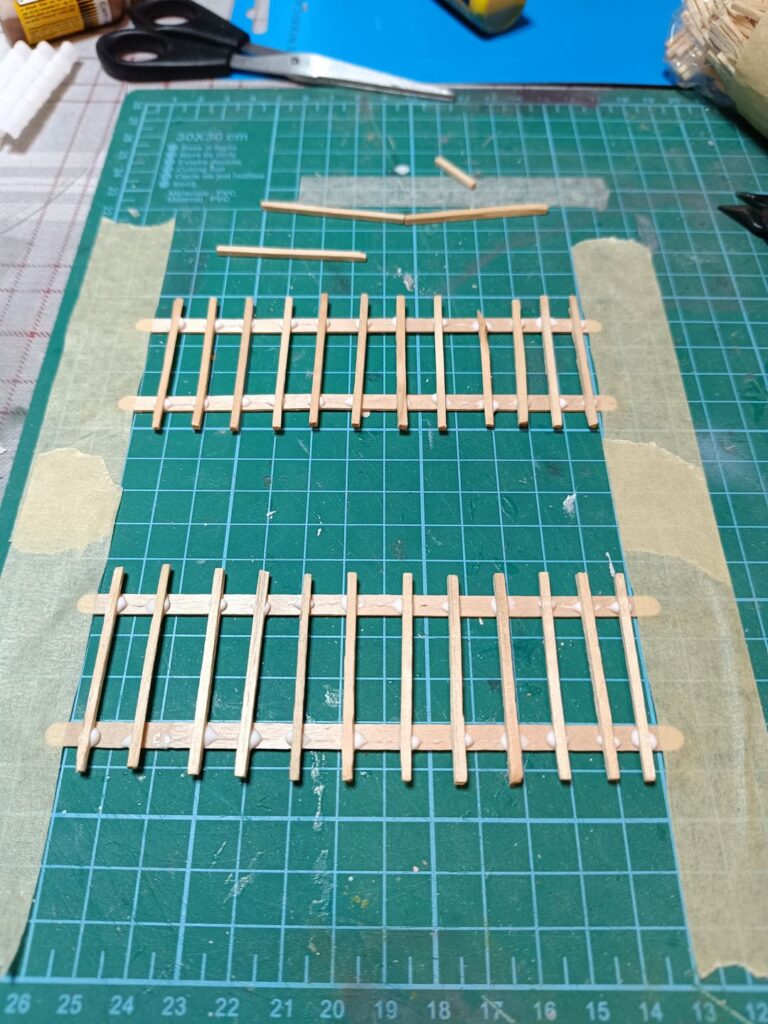
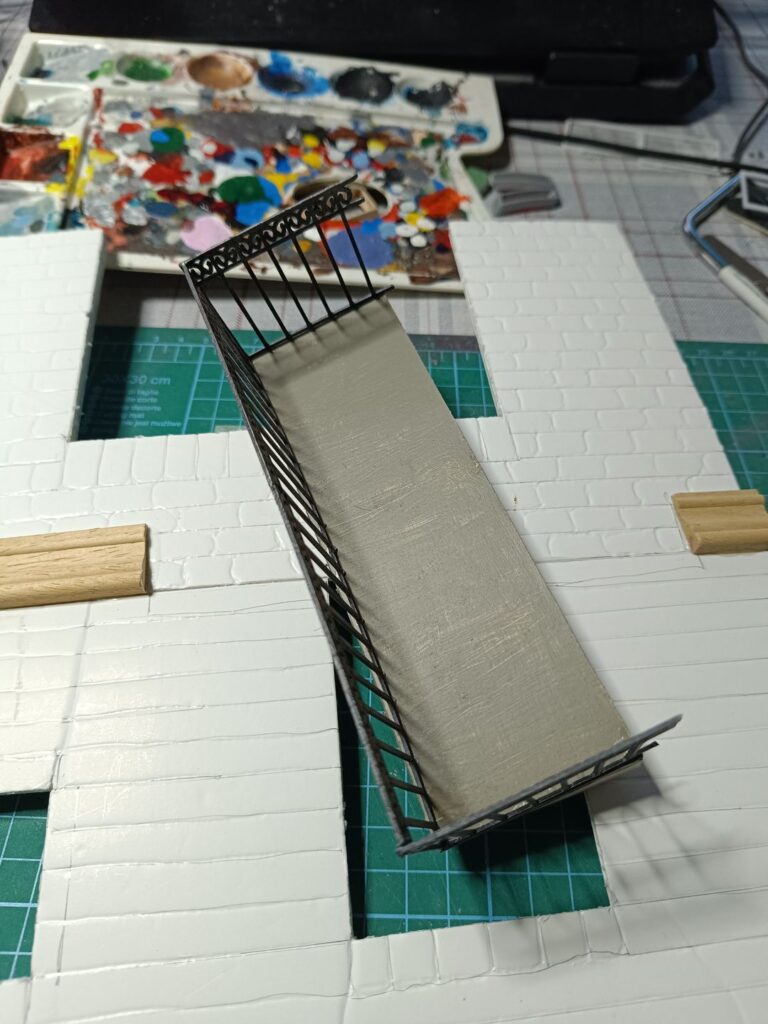
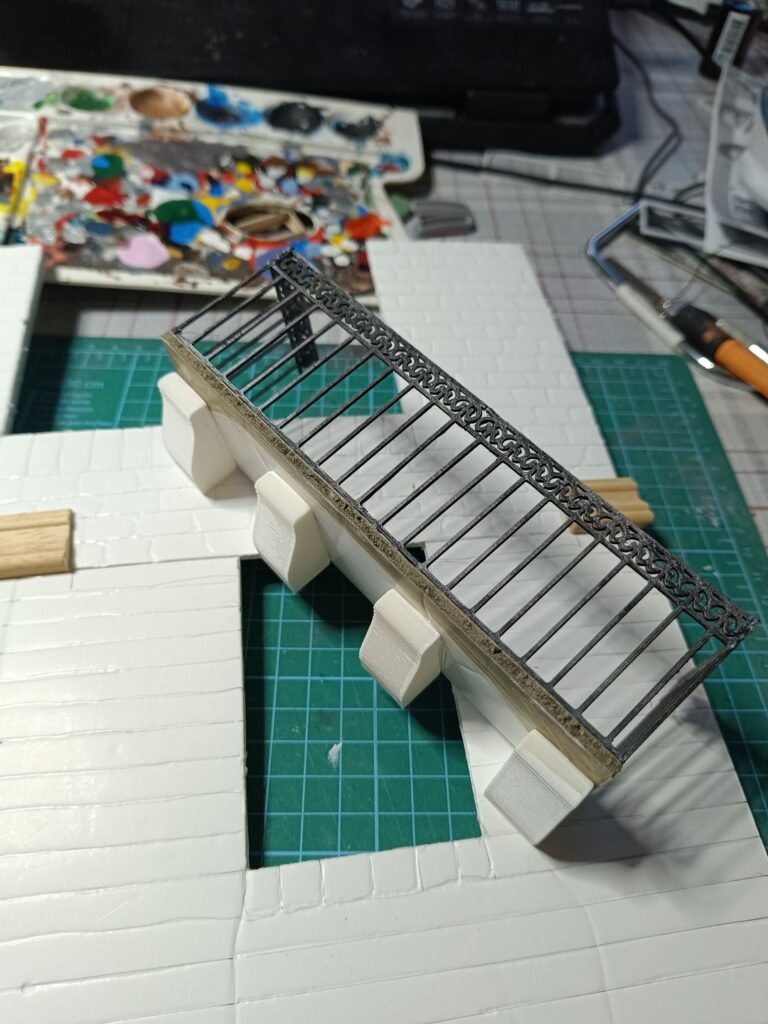
Some of the items were created gluing wood sticks (coffee, wood small planks) for the doors and for some other things like the table. Then I moved out to prepare a balcony to be attached at the end. The stands are printed, as well as the outer fence, the rest is expanded polystyrene covered on both sides with paper, the same that I used for all the buildings.
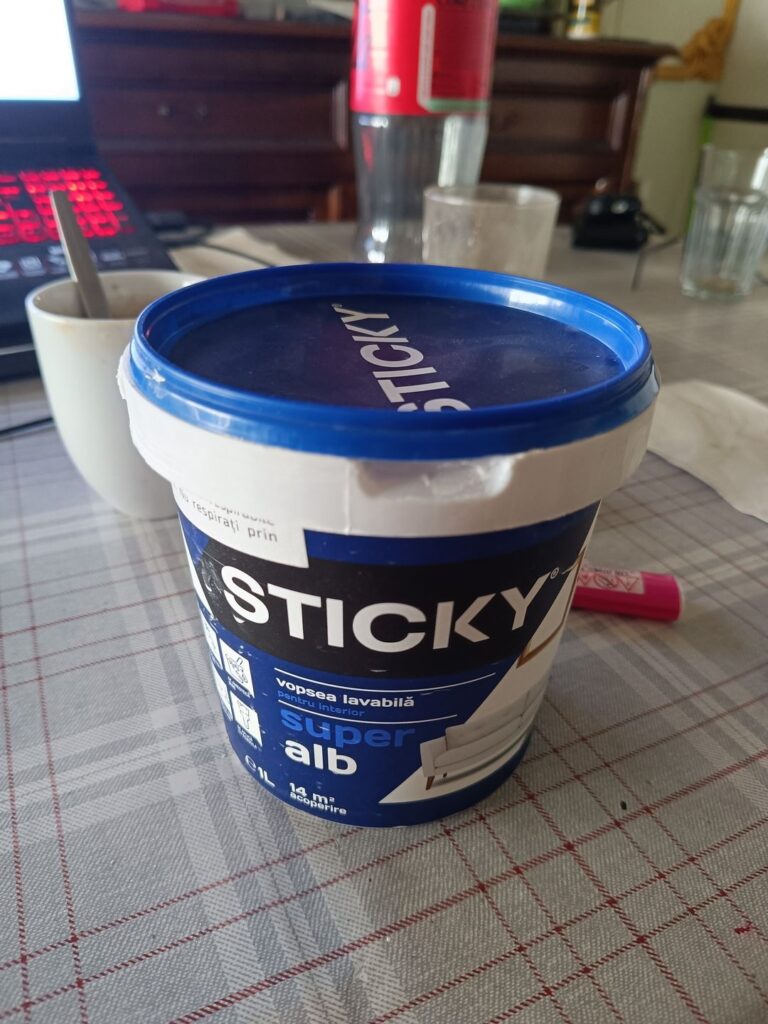
I primed everything before starting to apply color but only for plastic parts because for the polystyrene it was not needed. As a base of color in this cases I always use wall paint water based and add shades of color as I need. I find it cheper and durable in time. Probably with one of these you can do several nativities without worry, it needs to be diluted usually.
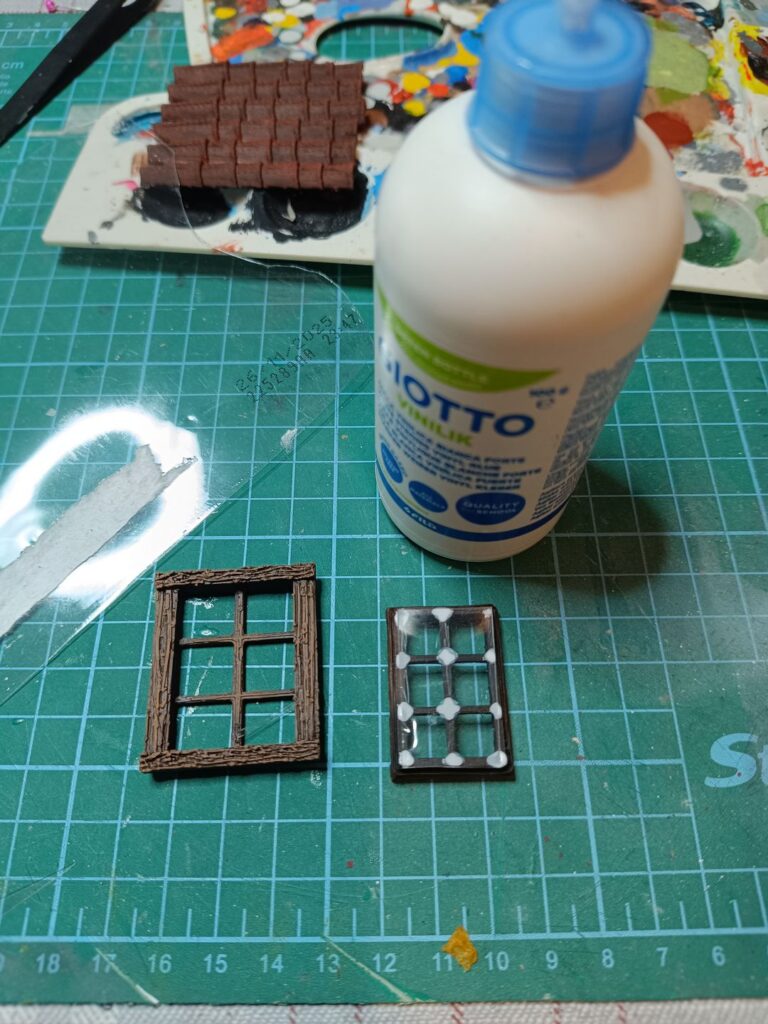
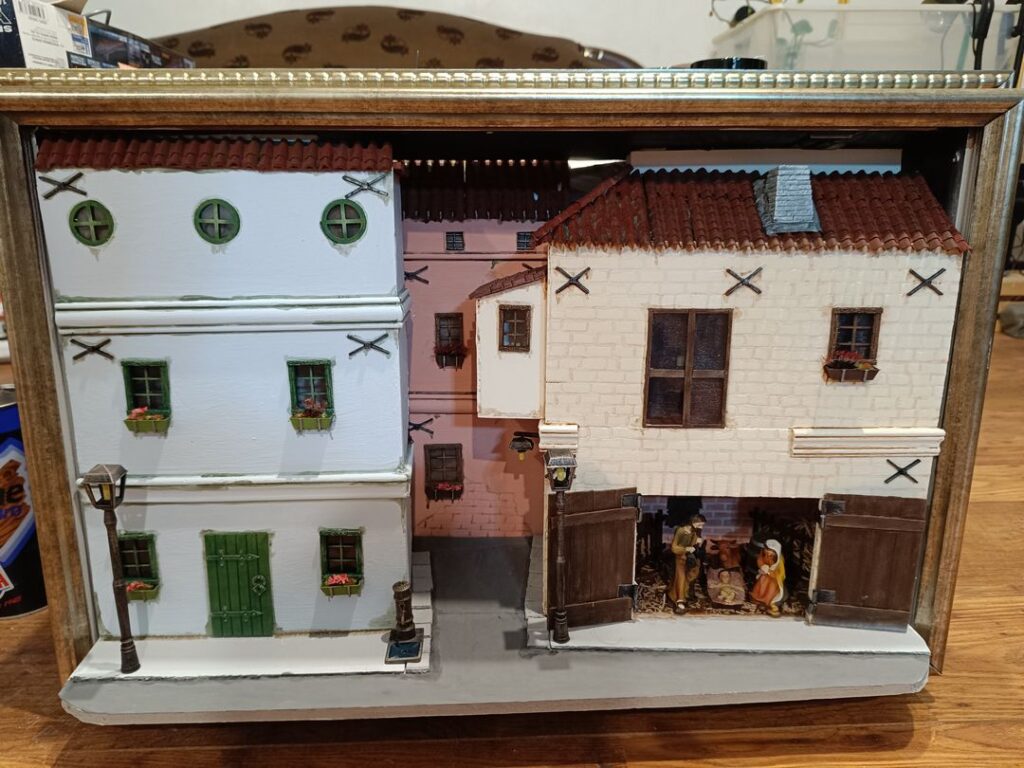
Then I moved to the windows and the rest starting to paint everything. For the windows I applied some plastic transparent squares taken from meat or sweets boxes, they are ideal for this.

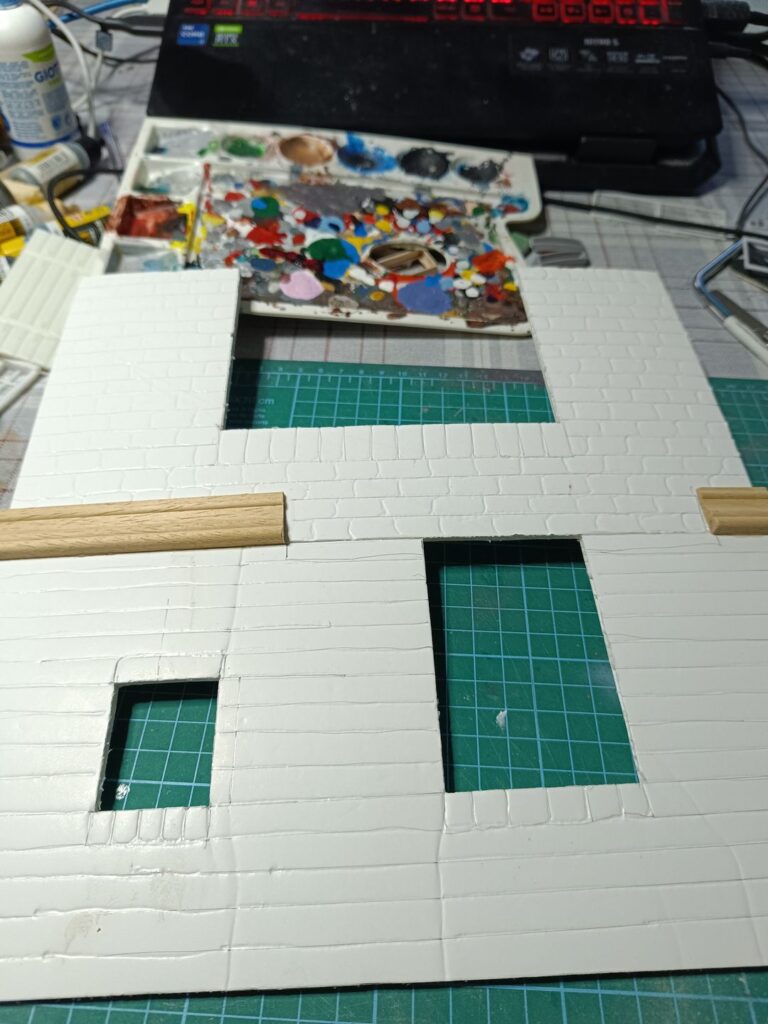
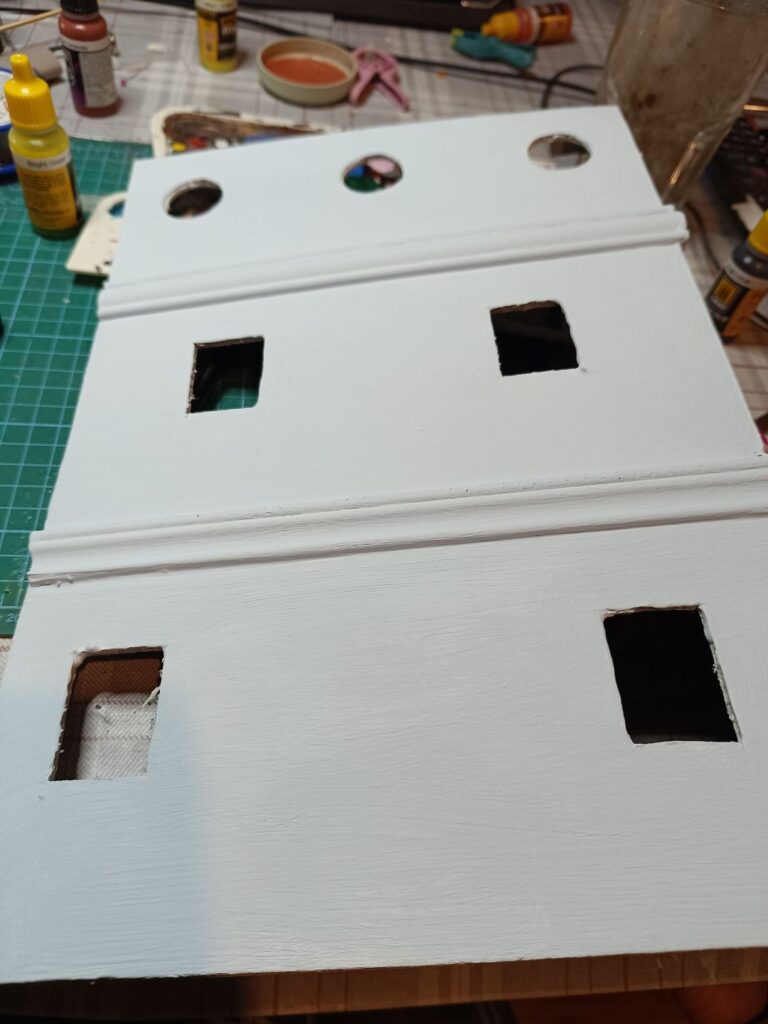
I started then to build the houses, for the decorations I used simply some wooden strips (the ones that you find in brico stores for angles or for dividing peinture from parchment in houses .
As you can see, once glued and painted they are indistinguishable from the walls.
Then I created the hinges for the big door of the stable. They are realized with metallic rods, heat-shrinkable tubes and cardboard and then painted.
For the figures I just bought some missing from a chinese shop: they are cheaper and better than the ones that you usually find in stores (mine were 7 cm).


So in the end I assembled everything inside the frame and started to add the necessary fixtures. After that I created a bit of weathering with sand and using different shades of green, yellow and darker colors for the walls of the buildings.
Final touch was to close the back with boxes in order to put on some internal lights.
It’s unfortunate that I don’t have any picure of the stable itself but I will try to add more details in the final pictures in the next days.
And finally the finished work (only general pictures). I promise to add something more detailed in the next days.
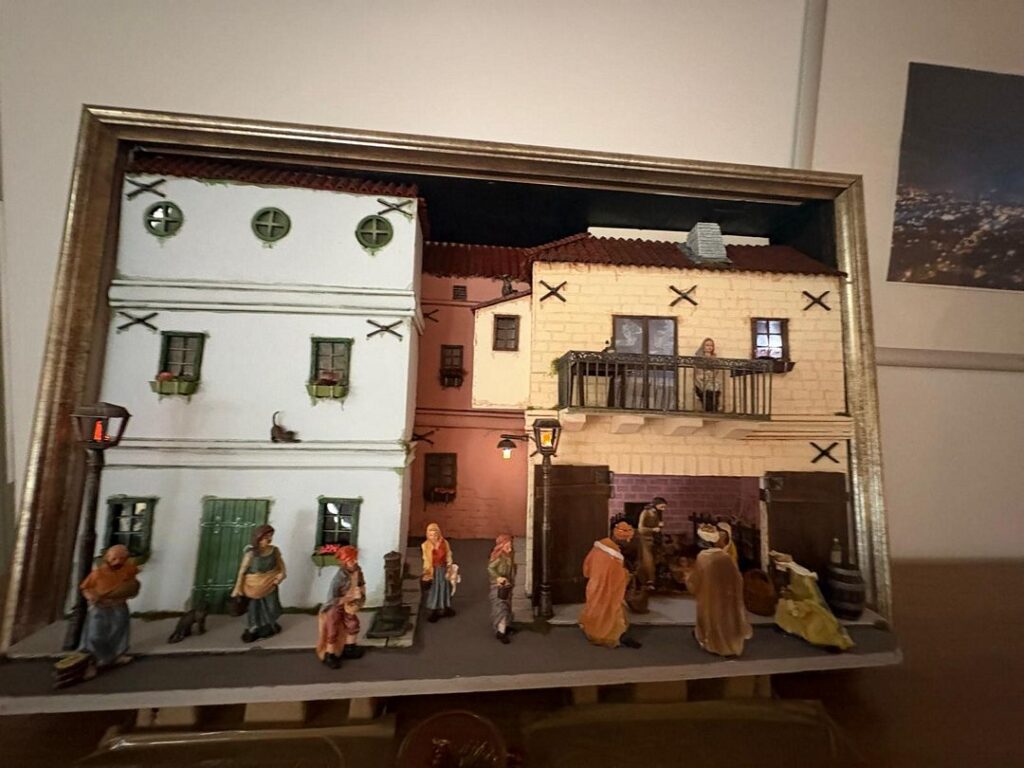
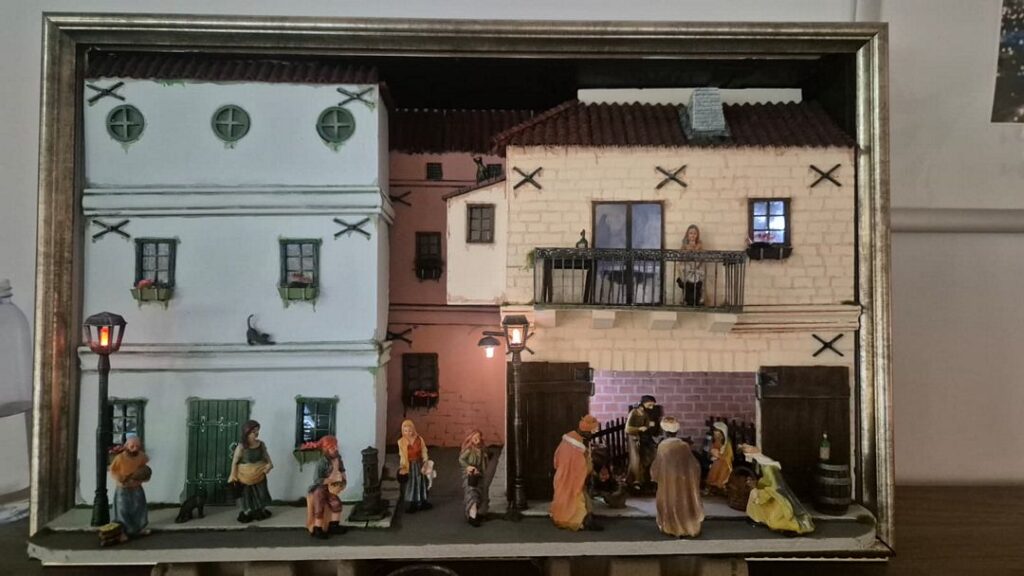
Hope you enjoyed the build !
![]()

Leave a Reply