Welcome to the printing and painting of Kotetsu Jeeg. This is one of the most iconic robot from the genius of Go Nagai and has various names (Kotetsu Jeeg or Jeeg Robot d’Acciaio in italian). I wanted to build the original anime version as close as possible.
I found the SLT on www.thingiverse.com here is the link: https://www.thingiverse.com/thing:5581832

After choosing the scale (this time I chose 25 cm). I printed with ABS. I already explained why I use ABS for models.
I Always consider that for 3D printed models you have a long work of refining the print with filers and various sanding with different grits. The model will never come out perfect (unless you have a super expensive professional printer or you use resin printers) but this is what my Crealty Ender Neo 3 can do and it’s enough for me.
After the print and the adjustments I proceeded with an acetone bath. I explained the procedure in other 3D prints description, but basically it’s done to create stronger bonds between the layers and to smooth the surface.
This is the final result before any coat. Plus there is one picture of the model not prepared but somehow assembled through holes and metallic rods just to have a general idea of the final model.


The colors of Jeeg are very complicated with several stripes that are very light in the legs (green with yellow stripes) and in the breast (the opposite, green stripes with yellow breast). The forearms are blue and yellow.
I gave the usual coat of primer (white). This time white was better because of the presence of the yellow. Whatever other color would have need to be painted several times to be bright, with a base of white everything is simpler.
All the parts were painted separately and I extensively used masking tapes of different width (0,3 and 0,4 mm primarily for the stripes, plus the curved type for other details like the arms to isolate the yellow bumps.


For the bellybutton, that basically is a laser cannon I opted for creating a decal and print it and then attach to the model with some special paint from AMMO called Plasticator, then I attached in position.

Then I prepared a base. I have a standard SLT that I created long ago and basically I try to print in different sizes as they fit the model. until now it was always ok. I then painted it in black.


Here you can see different sections painted and covered with transparent gloss protective coat and a detail of the head, painted mostly by hand with some highlights made with a 0.01 mm black liner pen. The model was then assembled using metallic wires and epoxy glue.


And finally the model is finished


Hope you enjoyed the build.
![]()
Related posts:
 3D Printed Mazinger Z with Creality Ender Neo 3
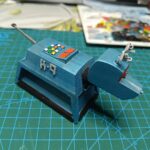 Printing and modeling K-9 from Doctor Who
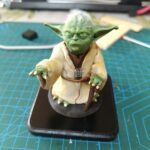 Master Yoda from Star Wars Printed with 3D printer
 Printing and Painting of the TFO of Koji Kabuto in Grendizer
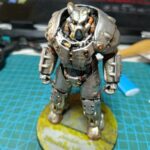 Printing and Painting of Quantum X-01 Power Armor from Fallout
 Babylon 5 Station 3D printed with Ender Neo 3
 Romulan Warbird D’deridex Class Battle Cruiser AMT No. 1125 scale 1:3200 2019
 X-Wing Starfighter Bandai No. 0191406 scale 1:72 2014
 LEGO Millennium Falcon n° 75375, 921 Pcs
 Battlestar Galactica “white edition” Bandai-Monogram n° 37023, scale 1:4105
Leave a Reply